Server Cabinet Cooling Using Relay-Controlled 140 mm Fans
This is a pretty trivial project - there is a server in a cabinet that needs cooling. The cabinet door has holes, but without proper airflow, the heat generated from the server has trouble escaping.
The Approach
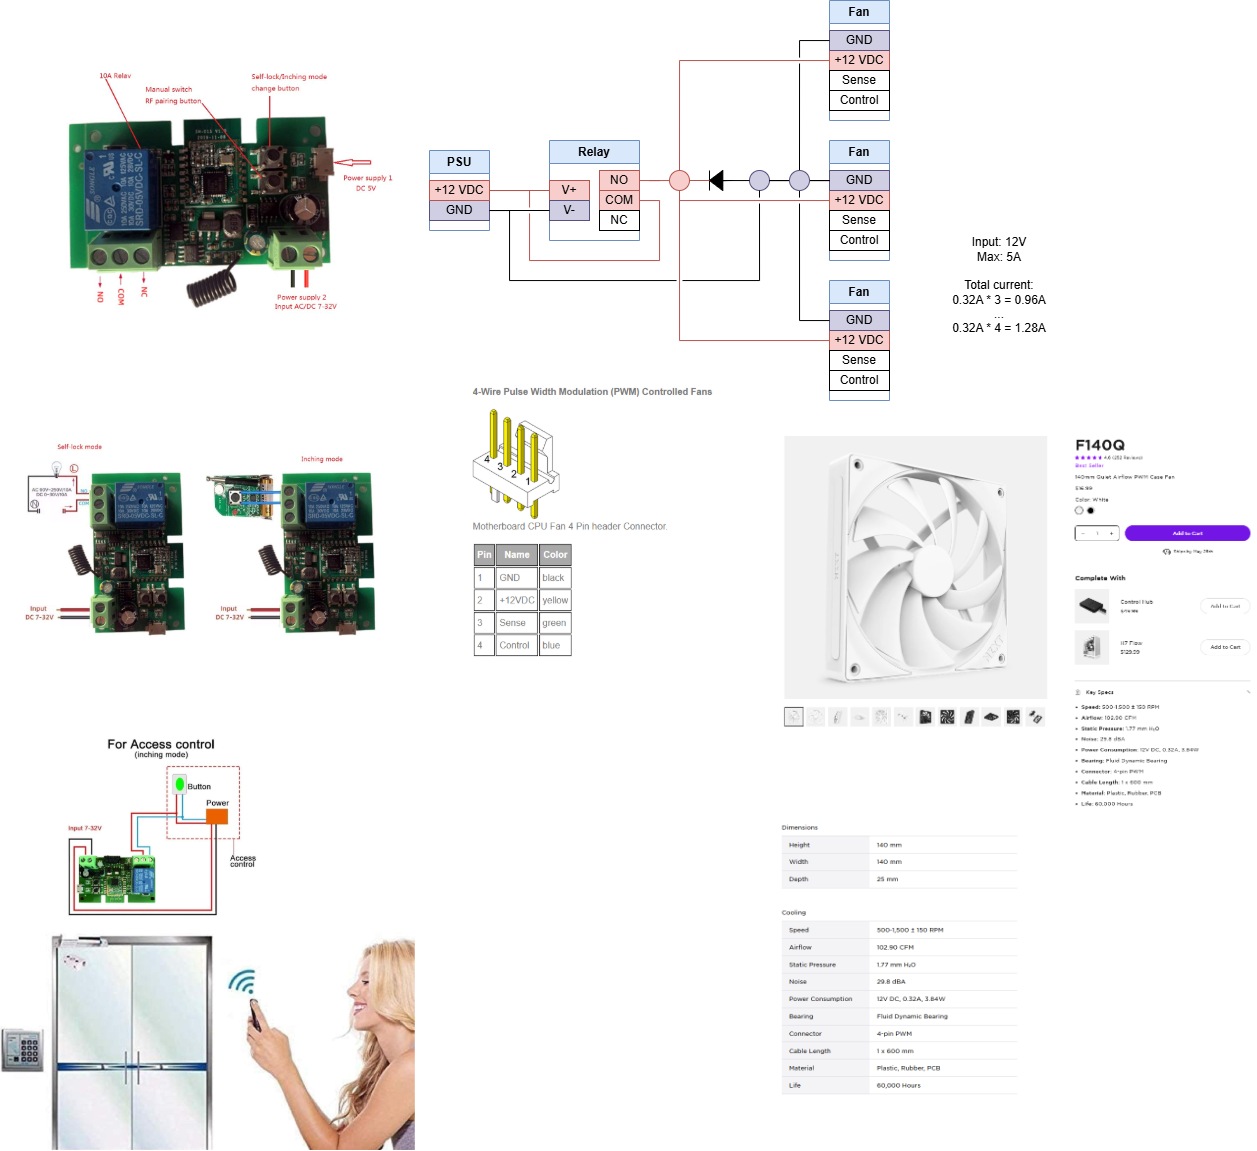
To improve airflow, I added three 140 mm 12 V fans to the cabinet and wired them through a small configurable relay module (controllable via Zigbee). I didn’t do any detailed analysis for fan sizing, but rather I figured if 3 CPU fans can cool a PC, having three CPU fans in the cabinet would be enough. So then the name of the game was simply to get the biggest CFM I could get for that form factor.
The fans are powered from a dedicated 12 V supply and switched together by the relay. The relay module supports both latching and momentary modes, which makes it suitable for a physical button, a remote switch, or an access-control-style trigger.
The 4-pin PWM fans are being used here as ordinary 12 V fans, and I did not use the PWM control as I did not add the complexity of such control. Instead Home Assistant is able to read the CPU temperature and I can turn on and off the fans as needed.
Power Budget
Each fan is rated at approximately 0.32 A at 12 V.
The fan supply is rated for 12 V at 5 A, leaving way more than enough headroom for startup current and avoiding operation close to the supply’s maximum rating.
Wiring Overview
The fan grounds are connected directly to the power supply ground. The relay switches the positive 12 V line shared by the fans.
1
2
3
12 V power supply
├── Ground ──────────────── all fan ground wires
└── +12 V ── relay ──────── all fan +12 V wires
The relay module has its own low-voltage control supply and can be triggered with its onboard button or an external switch. A diode across the switched fan load is included in the wiring plan to reduce electrical noise from the inductive load when power is removed.
Since the fans have their own power plugs, I got some fan cables and soldered plugs on a prototyping board in case I ever need to replace the fans.
Enclosure
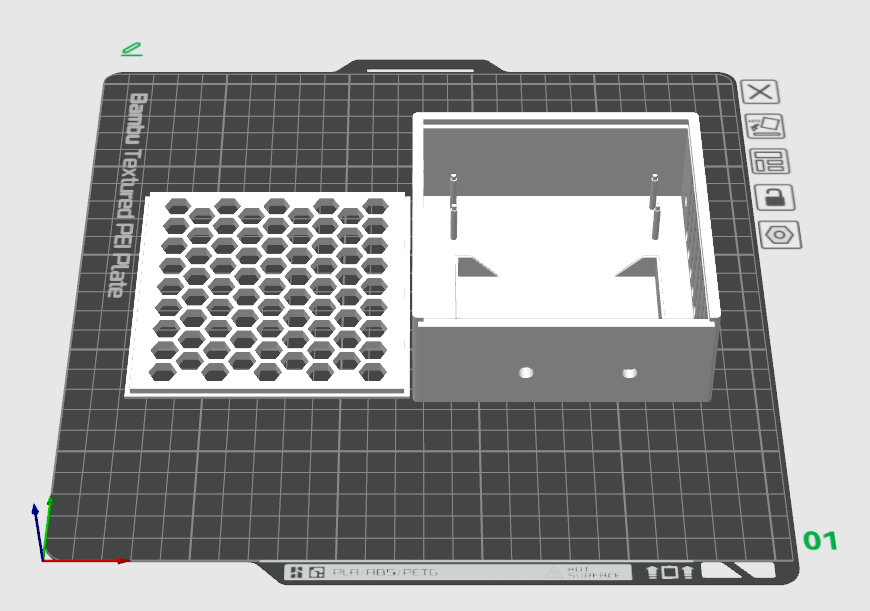
For the enclosure, I 3D printed a simple box to store all the components in with holes for the wires to come out of.
Dust Proofing
Given that fans are blowing air around, it’s easy for dust to collect inside the cabinet. I opted to have 2 fans sucking air into the enclosure through an air filter, and one fan blowing air out. The goal here is to create a positive air pressure in the cabinet will always push air out. I figure that if I had two fans blowing out instead, I would not be able to control the path of dust particles. Time will tell if this was the right move.